Jigsaws come in handy in cutting shapes and curved edges with their blades. But when it comes to making straight cuts, to be specific, there’s always this discrepancy that it cannot, or the cut won’t be perfect.
Well, the good news is that you make perfectly straight cuts with your jigsaw, but only if you follow the proper procedures. Thus, below is a step-by-step guide on how to make a straight cut:
- Prepare the Workpiece, Work Area, and Other Necessary Tools
- Measure and Mark the Cut Line on the Board
- Set up the Jigsaw on the Board and Use a Straightedge to Guide It along the Cut Line
- Secure the Board and Straightedge in Place with a Clamp
- Start Cutting
This article explains all the processes of making a straight cut using a jigsaw. You achieve a flawless straight cut if you follow these steps.
Five Steps to Making a Straight Cut with a Jigsaw
Straight cuts are often needed when making a variety of woodworking projects. Of course, you can make them with a jigsaw, but it is essential to know how to do it properly and safely.
The reason is that the jigsaw blade will often wander off the line, which is typically undesirable. Well, here is a step-by-step procedure to make sure that the cuts are straight.
1. Prepare the Workpiece, Work Area, and Other Necessary Tools
The preparation is somewhat straightforward but delicate because many factors can affect the materials you choose. Nonetheless, you’ll need a long meter rule, a marker, a straightedge, a clamp, and most importantly, a good jigsaw.
Note that the impeccability of the cutting depends on the blades. Thus if you choose a blade that doesn’t fit your work, there’ll be a compromise in the cutting.
It’ll help if you choose a blade that fits your wood type(its hardness) and size. Bi-metal blades, for instance, are best for hardwoods and materials. And though they are more pricey, they are also durable.
As a guide to picking the best blades, blades with a higher TPI(Teeth Per Inch), smooth line cuts. But note that if your wood or board is very thick, the blade has to be long enough.
In addition to your blade choice, preparing a good work foundation where you’ll place the board\wood will also be good. The work foundation can include a workbench that has a considerable weight-holding capacity.
Furthermore, speaking of your clamp choice, there are many clamp types, but not all of them are suitable for every job. It would help to have a firm clamp, especially when the piece of wood is thick and large.
Finally, your safety is also paramount; thus, get safety equipment like goggles and gloves.
2. Measure and Mark the Cut Line on the Board
The process here involves using the measuring tape, marker, and meter rule. All you need to do is measure the board or wood length you wish to cut. After that, position the rule on the measured length and draw a straight line.
Marking a straight line on the board is crucial and gives more precision. This is because the jigsaw will have to follow the drawn line. And if it is not straight, problems with the cut can result. So don’t be careless enough to think that your hand is straight enough, or else you’ll end up with an irregular cut.
Additionally, there are two methods for marking the wood with a jigsaw. The first uses a pencil or marker and marks directly on the wood. The marker will leave an imprint on the surface of your workpiece. It’s advantageous because the markings can be easily erased when the need for corrections arises.
The second method involves using an awl or sharp pointed object to make an indentation in the workpiece before you start cutting. This alternative is also a good one because it makes the markings clearer. The only downside is that there’ll be no room for correction.
3. Set up the Jigsaw on the Board and Use a Straightedge to Guide It along the Cut Line
After marking the straight line on which you’ll make the straight line cut, position a straightedge on the board- This positioning will aid the cutting by guiding the jigsaw and putting it on a straight path.
For more accuracy, place the straightedge some inches away from the marking. You can even place the jigsaw blade directly across the marked line to know the exact position of the straightedge. Alternatively, you can measure the distance between the Jigsaw edge and the blade, after which you’ll transfer it to the board.
When cutting a straight line with a jigsaw, it is crucial to position the straightedge correctly. The most common mistake is to place the straightedge too close to the saw blade. This will result in an inaccurate cut and will not produce a clean edge on one side of the cut.
The best way to position the straightedge is to place it parallel to the cutting line and perpendicular to the edge of the wood you intend to cut. It should be such that the jigsaw leans slightly against the straightedge, and the blade hits the cut line directly.
Also, note that the straightedge can be anything straight, as the name implies. It can be a yardstick, a long straight wood piece, or even a steel ruler, so far as it can get you an accurate cut.
4. Secure the Board and Straightedge in Place with a Clamp
After ensuring that the straightedge is at a correct distance from the cut line, clamp down the straightedge. Here, you’ll need to hold down the straightedge to the board, so it doesn’t dangle. The clamp must be strong enough to withstand the vibration of the jigsaw.
There are many clamp alternatives for you. The most basic clamping method involves using one hand to hold the wood while cutting with the other hand. But this method only works well when cutting small wood pieces. It works best in situations where you don’t need to make many cuts in one day. Yet, your hands are susceptible to conscious and unconscious mobility; uneven cuts may result.
Instead of using your hand as a clamp alternative, utilize the one-sided clamp alternative. The one-sided clamp alternative utilizes merely one clamp on the board side. This alternative can be beneficial, especially when the wood piece is small and overhanging.
But in a situation where the wood piece is large, utilize two clamps on both sides of the board. The reason is that the wood piece will not slide while the jigsaw is in motion.
Altogether, your clamps must be accurate for a good cut and to prevent kickback from the jigsaw. My recommendations include C-clamps or bar clamps.
While C-clamps are easier on small wood pieces and can be positioned on any surface, bar clamps are more versatile. They can be used on all surfaces and have a greater capacity for larger pieces of wood.
5. Start Cutting
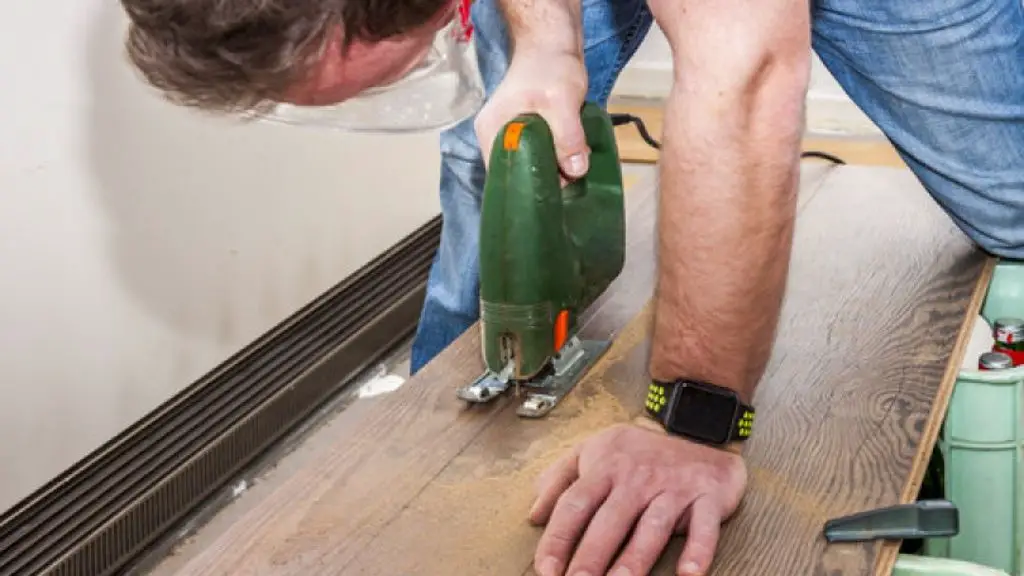
This step sums up the other procedures. And this is because, before cutting, you must ensure that the cut lines and everything else are in place. So, to begin, place the blade on the cut line and use it as a guide until you finish.
Place the blade in the middle of the cut line and push forward until it reaches the end. Once it reaches the end, pull back. Especially in situations where the board overhangs, be sure to have someone who’ll hold the overhanging portion as you cut.
Note that the cutting process would be problematic if your blades are loose. Once there’s no stability, the blades will continuously shake; a compromise cutting will result.
Also, it would be best to move the jigsaw slowly and allow it to cut naturally. Don’t add extra pressure; you may get an uneven line.
Additionally, while cutting the straight line with the jigsaw, it is essential to ensure that the blade is sharp. A dull blade will cause more friction and will be challenging to push through the wood. Moreover, the blade can easily get stuck or bounce off the surface if it does not have enough power.
Note that though the blade should be sharp, it shouldn’t go too shallow or deep. Likewise, keep your hands close together on the saw, and keep your thumbs out of danger.
It’s always best to use a jigsaw blade that is not too wide for the wood’s thickness. For example, using a ¼” blade on ¾” wood would not make sense.
Conclusion
Making a straight cut with a jigsaw isn’t an impossible task at all. It would be best if you used the right blade for the cutting material. You also need to ensure that you have enough depth of cut to avoid damaging the blade.
Don’t forget to utilize your safety wear. And likewise, be mindful of your working environment- the sawdust from the wood shouldn’t harm other inhabitants. After cutting, clean the environment and ensure the working area is tidy. The jigsaw should also be in good condition- sawdust free.
Overall, I hope you have successfully made a straight cut using a jigsaw while following the instructions in this guide.

I have always loved sawing and cutting. I started doing it when I was a kid and never stopped. I love the feel of the wood beneath my hands, the smell of the sawdust, and the satisfaction of creating something beautiful.
I’ve been writing for quite some time now and thoroughly enjoy sharing my passion with others. I’ve written for both online and offline publications – such as Amazon and Medium.