Circular saws are electric saws that help you to make a circular cut on wood or plastic. This tool is crucial in carpentry and makes cutting relatively easy. Although it requires accuracy and precision, you might easily make a mistake due to the sharpness and speed of the blade. However, if you follow the proper instructions, you are well on making the perfect plunge cut.
The circular saw, which is the buzz saw is the best option when it comes to making a plunge cut. For this cut, you must follow these steps. Here are the following steps to achieve a precise and neat plunge cut.
- Place the Wood on the Work Surface
- Wear Your Safety Gear to Avoid Injuries
- Connect the Circular Saw to a Power Source
- Mark Your Measurements on the Wood, Ensuring That They Are Accurate
- Clamp the Wood to Avoid Movements
- Place the Saw on the Wood and Raise Your Blade Guard
- Lift Your Saw and Line It with the Marking on the Wood
- Increase the Blade Guards Speed and Line It with the Marking
- Plunge Your Saw Through the Wood and Release Your Blade Guard
- Follow the Marking Carefully and Run Your Cut
This article contains sufficient information on making a plunge cut with a circular saw in ten simple steps. The steps involve a practical way to achieve this without hurting yourself or damaging your equipment.
10 Steps to Making a Plunge Cut with a Circular Saw
The best way to make a plunge cut through hardwood is to use a circular saw. It helps you lay the foundation so you can finish nicely with the jigsaw or handsaw. Using a handsaw to make a circular cut in wood is quite impossible. However, it will be the most uneven cut even if you succeed.
Luckily, a circular saw is in time to make things easier for homeowners and carpenters. Although this process might appear daunting, as long you wear your safety gear, you will be fine. In addition, remember to remove obstructions that might cause accidents. Finally, keep a steady hand through the process. Now, you can proceed with the following steps.
1. Place the Wood on the Work Surface
Before you begin, you must first place the wood on the work surface. This surface might be wood, laminate, or even glass, etcetera. The most important thing is that it is firm and can handle the pressure and force of the process.
Carefully place the wood and ensure it stays at the center of the work surface. If you do not place it correctly, it might lead to wrong measurements. Consequently, the wrong measurements will lead to an incorrect cut and ruin the entire process.
So, an instruction as simple as the position of the wood is not one for negotiation. Now, you can move to the next step.
2. Wear Your Safety Gear to Avoid Injuries
After the hassle of placing the wood correctly, the next thing is to wear your safety gear. Now, there is no need to feel like an expert and abandon your safety gear. The proof that you are an expert is that you adhere to the safety precautions.
Always wear all the safety gear before you begin working with sharp objects. This gear includes safety goggles, hand gloves, a face shield, and a nose mask. They help to protect you from harm while you work.
Accidents are inevitable, and you may not know when they will occur. So despite how careful you might be, there is still a probability that it might happen. Hence, seeing that we cannot control the inevitable, we could protect ourselves from the dangerous outcome.
3. Connect the Circular Saw to a Power Source
Afterward, connect the circular saw to a power source. The reason is that it is a piece of electrical equipment, unlike the handsaw and other mechanical equipment. So, you must locate a power source before you can continue.
There must be at least two electric sockets in your workshop. However, if you are not currently in your workshop, you must create a temporary socket. Most people prefer to work outdoors, so it is essential to have a lot of sockets where possible.
If you love to do a lot of repairs and fixes around the house, you must personalize your home accordingly. This includes altering the initial design or building with that personalization in mind.
4. Mark Your Measurements on the Wood, Ensuring That They Are Accurate
The next thing to do is to mark your measurements on the wood. This measurement must be exact and accurate since they are the map that your saw will follow. Also, the measurements depend on the dimension you are trying to cut out. Hence, if you wish to cut a rectangular hole, you must measure the width and length of the four sides.
Ensure that you keep a steady hand as you follow the measurements. In addition, use a pencil or marking pen to leave imprints. Do not worry about leaving a stain. If you cut through this marking, the marks will not be visible nor damage your piece.
5. Clamp the Wood to Avoid Movements
This step is essential, like the others. However, it helps your wood to stay in place even with the vibration from the saw. Use a work clamp to hold your wood to the work surface. Depending on the wood size, you can clamp all four sides of the wood.
This gives it balance and confidence that it will stay in place. Although you must be careful when tightening the clamps, so you do not dent the wood. Sometimes, you may break the wood or plastic if it is very light. Hence, it would help if you tightened it enough to be firm and not so much.
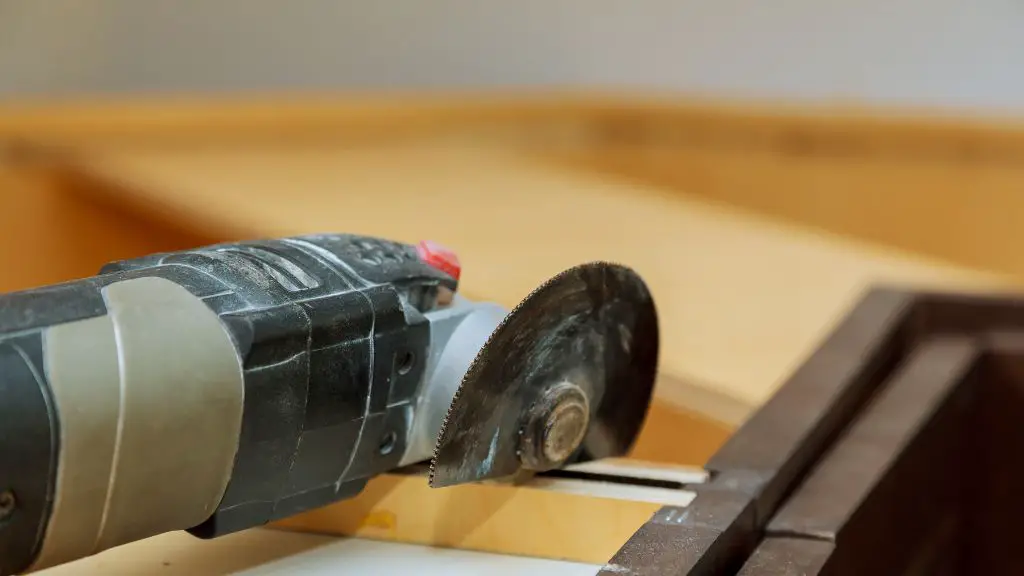
6. Place the Saw on the Wood and Raise Your Blade Guard
Now, place the saw on the wood and the marking. Hold it with a firm hand and raise your blade guard. The blade guard is a cover for the blade, and it protects it. Leaving the blade open is not safe for you to stumble upon.
It helps you handle the saw without thinking it would cut you. But, of course, this is only when the blade guard is unopened. However, once you raise it, you must be mindful of how you handle the saw. Any unnecessary movement might result in a workshop disaster.
Aside from cutting yourself, you could even damage the item you intend to cut through.
7. Lift Your Saw and Line It with the Marking on the Wood
Next, lift your saw and line it with the marking on the wood. Ensure to stand at the blade’s side so you can see what you are doing correctly. Hold the saw with a steady hand and place it at the center of the marking.
Please do not go in immediately; however, confirm at least twice that you got it right. Remember that one wrong move at this point will be detrimental to your job.
8. Increase the Blade Guards Speed and Line It with the Marking
Afterward, increase the blade guards’ speed to a convenient level. The reason is that a slow blade will take time to cut through hardwood significantly. However, if you work with plywood, you can leave the velocity minimal.
Sometimes, a slow speed is best if you do not wish to cut out the piece but make an incision. Consequently, it will be best to control, and you won’t have much to battle. On the other hand, if the speed is too high, you won’t be able to control the pace and might cut through the wood.
9. Plunge Your Saw Through the Wood and Release Your Blade Guard
When everything else is ready, plunge through the wood and release your blade guard. This way, you can hold the saw with a steady hand and focus on going in a straight line. In addition, the guard no longer covers the blade’s mouth and can plunge correctly.
Remember that you can only plunge as far as you want. The depth depends on how far you move your hand, so it is up to you. Consequently, the entire result depends on your ability to control the circular saw.
10. Follow the Marking Carefully and Run Your Cut
You must be mindful to follow the marking of the object you drew. After plunging the saw, ensure to follow the marking as close as possible. However, it would help if you did not cut to the edge. Instead, leave the corners for the handsaw or jigsaw.
When you cut close to the four edges, stop there. Take a handsaw and cut the edges out. This reduces the chances of ruining perfect wood. Finally, you can see that you did a perfect job!
Conclusion
In conclusion, making a plunge cut is not a difficult task. However, you must carefully provide accurate measurements and follow them precisely. In addition, a firm hand is an essential factor in achieving a clean cut. The circular saw is best if you want to get creative.
Now, the steps in this article are practical and easily understandable. Ensure to follow closely for excellent results. Overall, I hope you found this helpful.

I have always loved sawing and cutting. I started doing it when I was a kid and never stopped. I love the feel of the wood beneath my hands, the smell of the sawdust, and the satisfaction of creating something beautiful.
I’ve been writing for quite some time now and thoroughly enjoy sharing my passion with others. I’ve written for both online and offline publications – such as Amazon and Medium.