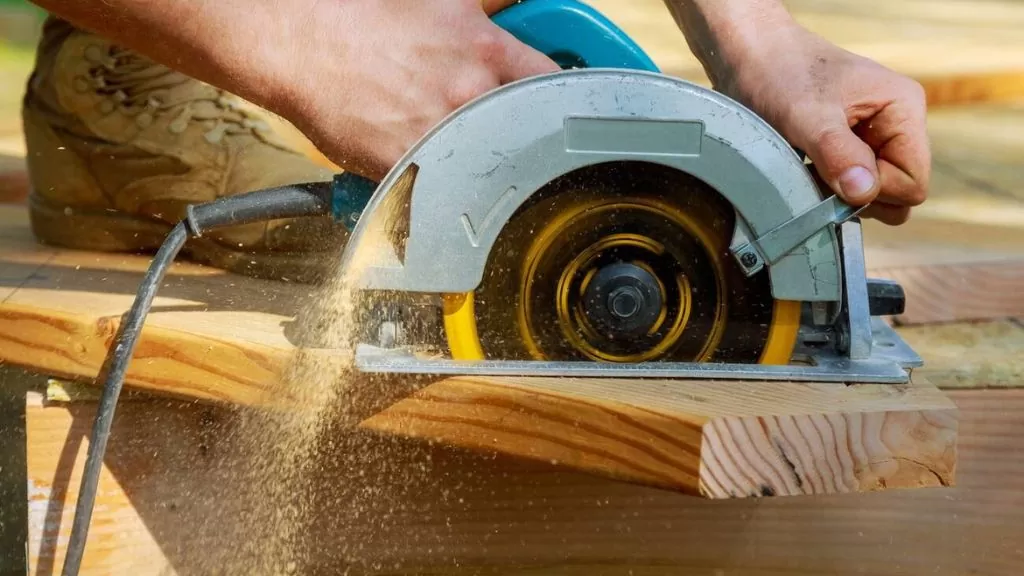
Circular saws are arguably the most versatile power tool in a woodworker’s arsenal. They can be used for everything woodwork, ranging from the cross and rip cuts to even angle cuts. All you need is control and efficiency. Consequently, if you want to cut your frame pieces or table legs, knowing the ideal steps is crucial.
Depending on what type of angle cuts you want, that is, miter or bevel, the procedures below give you more insight:
Here is how to make Miter cuts with a circular saw:
- Prepare the Workpiece, Work Area, and Other Apparatus
- Measure and Correctly Imprint the Cut Line
- Determine the Cut Depth
- Set Up the Straightedge and Clamp it
- Cut the Piece and Smoothen the Edges
Making Bevel cuts with a circular saw:
- Prepare the Workpiece, Workplace, and Other Apparatus
- Estimate the Bevel Angle on the Machine and Mark the Cut Line
- Determine the Cut Depth
- Set up the Straightedge and Clamp it
- Cut the Piece and Finish the Edges
This article reveals the step-by-step procedures for making different angle cuts with a circular saw. Every process is simplified, and you don’t necessarily need to be professional.
How to Make Angle Cuts with a Circular Saw
Since specialized angle cut saws are not so easy to find around and expensive, circular saws have come up as a replacement. But to achieve accuracy and precision, you must follow the ideal procedures. Not following the ideal procedures can result in compromised cuts. Whether it’s a miter or bevel cut, there are guides you must follow.
Making Miter Cuts With a Circular Saw
To make miter cuts with a circular saw, carefully follow these steps:
1. Prepare the Workpiece, Work Area, and Other Apparatus
Like any other woodwork adventure, you must ensure everything is in place before you begin. This includes ensuring that the work area has enough space and the availability of the necessary tools.
Subsequently, the necessary materials include a marker, a straightedge, masking tape, speed square, clamps, sandpaper, the workpiece, and obviously, a good circular saw. First, ensure that the circular saw is very much in condition- inspect the blades and nuts.
As a matter of fact, your blade choice is a crucial decision and depends on what you’re cutting and how thick it is. There are two primary blade forms: carbide-tipped and steel-tipped.
Carbide-tipped blades are best for cutting thick materials like hardboard or MDF because they stay sharper and are longer. They won’t bog down as easily when cutting through thicker materials. Conversely, steel-tipped blades will be more effective for thinner materials.
In addition to the necessary tools, your safety wears are also necessary so remember to make them available. While the goggles prevent sawdust from getting into your eyes, the gloves prevent accidental cuts.
2. Measure and Correctly Imprint the Cut Line
Your next action after the preparation should be to measure the cut line and mark it accurately; that’s where the speed square comes in handy.
Depending on what angle you want to cut, use the speed square as a guide in finding the exact calibration, then mark that point. Though not mandatory, you can cover the cutting area with masking tape to make the marking more visible and clear.
For a more precise understanding, let’s say you want to make a 45⁰ miter cut. Firstly mark the point spot you wish to begin the cut. Afterward, position the speed square at that point and ensure it’s straight enough.
Balance the speed square till you get a 45⁰ angle, then mark. Note that one side of the speed square represents 90⁰ while the other two represent 45⁰ each.
In situations of 135⁰ cuts, place the speed square on the wood such that the 90⁰ vertice touches the wood edge. After that, draw a perpendicular line against that same edge, and make a 45⁰ cut line. Note that the 45⁰ cut line should be on the side you want to make the angle cut. Subsequently, cut out the remaining 45⁰, and you have your 135⁰ cut.
To make the work easier, especially in scenarios where you’ll need to make less or greater than 45⁰, utilize a protractor. It’s more precise and will save you systematic and manual errors in the long run. While using the protractor, the wood piece edge should be your reference line.
3. Determine the Cut Depth
Here, you’ll need to establish the cut depth of the circular saw blade, i.e., how depth the blade will go into the wood. Typically, setting the blade depth in the wood when making miter angle cuts with a circular saw is a vital process. The reason is that if you set it too deep, making a straight cut will be difficult.
Conversely, if it’s too shallow, the blade will not cut through the wood, resulting in an uneven cut. Moreover, the workpiece could impair in the long run.
For more efficiency, the blade’s depth should depend on the workpiece thickness or width. This will ensure that the blade cuts all the way through. Thus, measure the wood’s width and use that to determine the blade length.
As a guide, no matter how you set the blade, ensure that it extends the wood’s width by ¼ inch. And remember that as much as the blade should be deep enough so that it doesn’t get stuck in the process, it shouldn’t extend too much.
4. Set up the Straightedge and Clamp It
After setting the blade depth, establishing the straightedge with a clamp should be next. Though you can use the speed square as an alternative, getting a wood plank straightedge is advisable in some scenarios. The reason is that the speed square has a low width; this will be incomparable with a wood piece with a high thickness.
To set up the straightedge at the appropriate distance from the cut line, measure the distance from the machine edge to the blade. Afterward, transfer the evaluation to the board, using the cut line as the reference point.
It’s essential that the straightedge marking is parallel to the cut line and doesn’t interfere with the cut angle.
After setting up the straightedge correctly, hold it in position with clamps. The clamp stabilizes the workpiece securely against the saw in the cutting process.
A good rule of thumb is that the clamps should exert at least as much pressure as the force applied to them by the clamped workpiece. Depending on the surface area of the wood piece, you can use one or two clamps. That is, one each at the opposite sides.
5. Cut the Angle and Smoothen the Edges
To ensure an accurate cut, place the blade directly on the cut line and ensure it leans suitably against the straightedge. Then, move the machine gently from one end of the cut line to the other.
As a guide, don’t apply pressure on the saw while cutting, as it will push the saw away from the cut. Moreover, the blade can accidentally go against the wood and kick back at you.
It’s essential to use the circular saw properly to avoid injuries. Thus, hold the circular saw with both hands and keep your fingers away from the blade. Also, wear your safety clothes to shield sawdust or other flying chips.
In any scenario where the wood is thick, you’ll need to flip the edges and make a perfect revolution cut.
Subsequently, smooth the wood edge after making the angle cut. The finishing makes for a more professional look and reduces the splinters. This idea will be excellent if you intend to paint your project or use it another way.
The downside of this process is that it takes more time, which can deter people who are short on time. It can also be inconvenient if you don’t have access to power tools like a belt sander or orbital sander.
Additionally, the wood smoothening likewise depends on the wood type. For instance, if you’re cutting softwood, it is best to use a smoother blade. It will help prevent splintering and give a cleaner cut.
But If you are cutting hardwood, then it does not matter as much as the wood will not splinter as easily. But if you still want to smooth the edge, then it is best to use a more delicate blade that will not cause any damage to the wood surface. Your smoothening should never affect the cut angle.
Making Bevel Cuts Using a Circular Saw
To make bevel cuts with your circular saw, follow these next steps:
1. Prepare the Workpiece, Workplace, and Other Apparatus
The preparation here is similar to the case of miter cuts; you’ll need the same materials. That is a marker, a straightedge, clamps, and so on.
In addition to the standard tools, it’ll help if you implore the use of a workbench. But alternatively, you can make the angle bevel cuts on the floor, on a table, or on any other suitable surface. However, note that a good workbench will help you make more accurate cuts.
2. Set the Bevel Angle and Mark the Cut Line
The process here is slightly different from miter cuts. And this is where the main disparity occurs. Unlike the miter cutting, where you must use the set square to determine the angle and mark it, the calibration here occurs in the circular saw. So kindly adjust the saw blade according to your desired cut angle, and fasten the lever.
Thereafter, make a straight marking with the speed square to indicate the start of the cut line. This is where you’ll set the blade to make the bevel cut.
3. Determine the Cut Depth
Following the establishment of the bevel angle, estimate how depth the blade should go into the wood. Always use the wood width as a guide and ensure the blade extends by about ¼ inch.
It’s essential to consider the depth of the blade in the wood when making angle bevel cuts because it helps prevent uneven cuts. The blade depth should always match the thickness of the material. If it’s too deep, you will end up with a bevel cut that is too steep and undesirable. You also want to ensure that the saw blade has a sharp edge, which will ascertain a clean cut.
4. Set up the Straightedge and Clamp It
Now, measure the relative distance between the circular saw edge and the blade and transfer it to the board as usual. But this time, you must be careful this time because there’s an adjusted bevel angle. So carefully take the distance between the adjusted angle blade and the machine edge.
For a more precise understanding, if you intend to make a 45⁰ bevel cut, take the distance between the machine edge and the 45⁰ line, not the 0⁰ line. Afterward, transfer the evaluation on the board using the cut line as the reference point and position the straightedge correctly. Also, remember to set the clamps on both sides of the wood piece.
5. Cut the piece and finish the edges
The cut here isn’t so different from what you’ll typically do. Take the machine blade from one end of the wood piece to the other. But at the same time, don’t try to go against the slant motion of the cut to avoid cutting inaccuracy.
Following a couple of moments past, smoothen the cut surface with sandpaper. Do it gently to avoid reducing the bevel angle or unnecessarily chopping off the wood.
Finally, put on your safety clothes while cutting to safeguard your health. The reason is that the chips and dust are hazardous and respiratory problems can result.
Conclusion
Making angle cuts with a circular saw is an achievable DIY exercise. To carry out this task, you mustn’t have a high level of technical know-how or a wide range of woodwork experience. Whether it’s a miter or bevel cut, all you need is the correct procedures given above. Keenly follow every step, and you’ll be alright.
Most importantly, be careful with the measurements. If the measurements are not precise, the angle cuts will not be accurate. And this can cause problems when using the cut wood for a project.
Also, ensure the radius of the blade is accurate, as it determines the ease and impeccability of the cut. I look forward to you making a successful angle cut.

I have always loved sawing and cutting. I started doing it when I was a kid and never stopped. I love the feel of the wood beneath my hands, the smell of the sawdust, and the satisfaction of creating something beautiful.
I’ve been writing for quite some time now and thoroughly enjoy sharing my passion with others. I’ve written for both online and offline publications – such as Amazon and Medium.