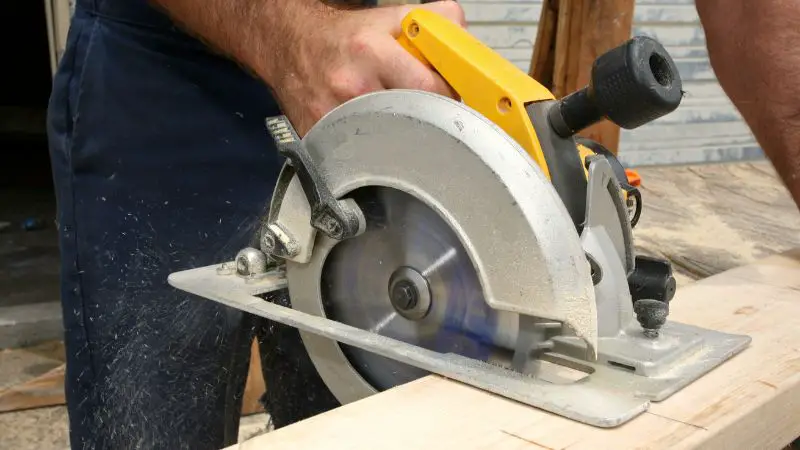
The idea of improvising during handiwork brings both a new invention and self-fulfillment. For these types of jobs, a cutting tool is essential. The circular saw makes it easier to cut wood leisurely on your worktable.
If you do a few things, you can use your circular saw as a table saw. So, here are the following steps on how to use circular saw as a table saw.
- Get Your Wood And Place It on Your Work Surface
- Use Your Protractor to Measure the Length and Width of the Platform You Intend to Place the Circular Saw
- Measure Double Two-inch Pieces of Woods And Cut It with the Saw
- Glue the Wood Pieces Together to Create a Fence
- Use a Nail Gun to Drill Nails to Hold the Fence More Firm
- Take the Platform for the Wood And Mark the Area That You Want to Make a Plunge Cut
- Steadily Cut Through the Wood Careful Enough to Mark the Size of the Blade
- Drill Four Holes on the Four sides of the circular Saw to Hold It in Place on the Platform
- Insert Screws Into the Four Holes While Lining Up the Distance From the Board’s Edge
- Attach the Platform with the Circular Saw to Your Work Surface
- Place Your Fence a Few Inches From the Blade
- Voila! You Have Your Make-shift Circular Saw Turned Table Saw
Now, this article contains detailed steps on how to use a circular saw as a table saw. First, it involves making the platform that the circular saw rests on to how you can use it on the work surface.
12 Steps to Using a Circular Saw as Table Saw
Getting a clean cut is vital in carpentry and upholstery work. However, achieving this is impossible, especially when you need the right tools. On the other hand, it may be possible but rather challenging.
Now, if you have a circular saw and need to improvise, you can easily do so. This will save you the time of purchasing a table saw and cost. Even with this, you should still have the appropriate tools. Instead, work towards gathering as many tools as possible, making your job easier.
But, of course, if you are in a fix and need to cut some fine wood, a circular saw is the best option. It helps to cut smaller sizes of wood for more complex designs. The precision and accuracy are precisely what a handyman needs around the shed. After you get the wood and proper tools, you can follow these steps to achieve a usable table saw.
1. Get Your Wood And Place It on Your Work Surface
First, you need to get the board you want to work with. This board will be for the platform where you will attach your circular saw. Now, clear your work surface and place your wood on it.
This way, you can mark your measurements and cut the needed parts without any obstruction. In addition, it also provides a platform for the circular saw to rest.
2. Use Your Protractor to Measure the Length and Width of the Platform You Intend to Place the Circular Saw
Next, use your protractor to mark 24 by 21 inches on the wood. This marking stands for the platform that accompanies the circular saw. However, you can decide to make it smaller or larger, seeing that there is no ideal size.
Once you get the precise measurements, cut the excess and place the platform aside. Furthermore, you must proceed to do other things.
3. Measure Double Two-inch Pieces of Woods And Cut It with the Saw
After you set the platform aside, take the remaining wood and mark the two-inch width. Refrain from bothering the length; mark the width and cut two pieces out. These sticks will be the fence for the circular saw while you work on the table.
It will provide a solid edge for the wood you cut to give an extra firm hand. But, of course, it is not a mandatory step. Hence, you can skip this part if you feel you can do without it.
4. Glue the Wood Pieces Together to Create a Fence
If you took the previous step, the next thing to do is glue the two pieces together. Then, lay one end horizontally while you place the other on its body. This forms a fence-like structure that looks like an elbow.
Then, apply glue on each surface that will stick to the other. The glue helps to hold it in place before you nail them together. Also, you can use whatever glue you have around, as long as it sticks correctly.
5. Use a Nail Gun to Drill Nails to Hold the Fence More Firm
To further hold the fence together, drill nails in the elbows to hold them in place. To do this, you can use a nail gun and drill nails at least one inch apart. But, if you have a hammer, it could also work.
It would be best to use at least 3-inch nails, so it does not protrude to the other end. But if it does, you can clip it with an electric filer.
6. Take the Platform for the Wood And Mark the Area That You Want to Make a Plunge Cut
Place the fence aside and put the 24 by the 21-inch platform on the work surface. Next, use a T-square to mark the point you want the blade to cut through. This action will guide you through the process and stop you from making errors.
Always remember that correct measurements lead to correct results and a messy job. Aside from the frustration it comes with, it also leads to waste. Consequently, you must confirm the markings at least twice before you proceed.
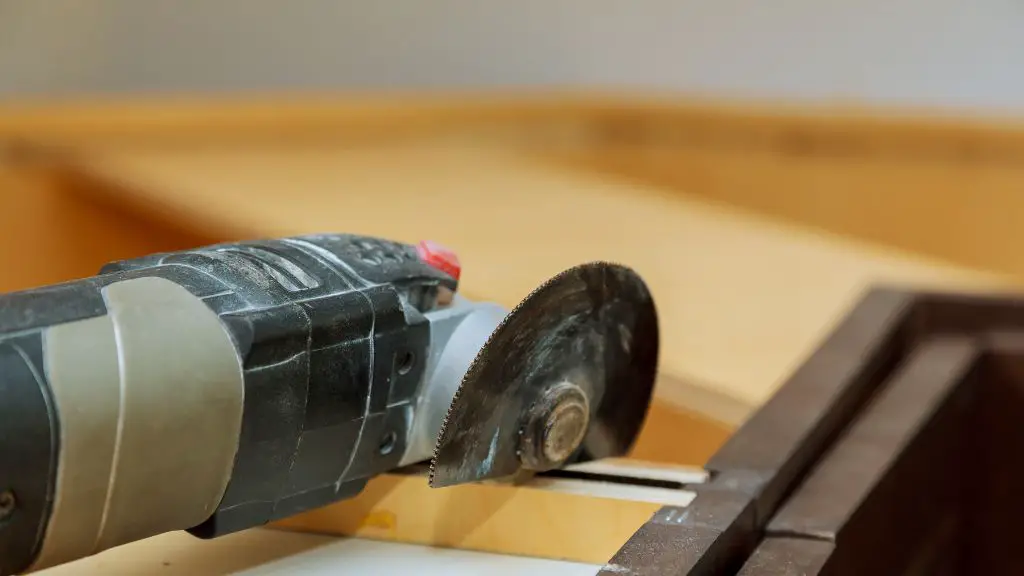
7. Steadily Cut Through the Wood Careful Enough to Mark the Size of the Blade
When you decide on the position of the circular saw, place it on the wood and cut through. However, you must plunge through the hole repeatedly to create sufficient room. This allows the blade to roll when you work.
In addition, it also helps you to mark the size of the blade. But, of course, if you need to replace the blade, you must repeat the process. The reason is that there are various types of blades in different sizes.
8. Drill Four Holes on the Four sides of the circular Saw to Hold It in Place on the Platform
Then, drill four holes on the sides of the circular saw. These holes allow you to screw the saw to the platform. In fact, without those holes, the saw cannot suspend on its own. It acts as the anti-gravity tool that helps it stay.
Now, you must ensure that the holes are neat and correct, as any damage would be to your saw’s detriment.
9. Insert Screws Into the Four Holes While Lining Up the Distance From the Board’s Edge
Afterward, insert screws into the four holes to seal them in place. If you do not have screws, you can use nuts and bolts. However, you must ensure that it is firm and would not fall off easily. Nonetheless, ensure to check the screws occasionally and tighten them when you notice that they are loose.
This way, you can work smoothly without injuring yourself or damaging your work table.
10. Attach the Platform with the Circular Saw to Your Work Surface
When the screws are in place, the next thing to do is to turn the blade upside down. Remember that you need the edge with the blade and not the handle. So, you must turn the platform upside down before you proceed.
Afterward, nail two edges to your work surface and support the other end with another wood. This wood acts as a wedge and holds the platform in mid-air. Note that this wedge must be sturdy and can support the weight.
Use some glue and nails to hold them together.
11. Place Your Fence a Few Inches from the Blade
Take your fence and place it a few inches from the blade. It would be best to screw it in place to adjust it. You might want to cut different sizes of wood, and it could restrict you.
Thus, you could make your job easier by making the placement temporary.
12. Voila! You Have Your Make-shift Circular Saw Turned Table Saw
Finally, you have your circular saw turned table saw. However, it is not a permanent adjustment. You can permanently dismantle the set-up if you no longer need it. But, of course, if you own more than one circular saw, you can assign a particular one to this task.
Watch out for the sharp end of the blade, so you do not cut yourself. In addition, change the blade regularly to avoid blunt cuts. Finally, remember to wear safety gear. Now, you can cut the wood into the desired pieces.
Conclusion
In conclusion, the steps to using a circular saw as a table saw are achievable. However, there are only so many ideal steps. Feel free to improvise here and there as long as you are comfortable. These steps in this article are simple and self-explanatory. All you need to do is get the right tools and work. I hope you found this guide helpful.

I have always loved sawing and cutting. I started doing it when I was a kid and never stopped. I love the feel of the wood beneath my hands, the smell of the sawdust, and the satisfaction of creating something beautiful.
I’ve been writing for quite some time now and thoroughly enjoy sharing my passion with others. I’ve written for both online and offline publications – such as Amazon and Medium.